The Proclamation
TL;DR
Debug and fix a bootloader that decrypts a flag
Description
A mysterious file appeared on a deep dark web forum. Can you figure out what we can’t see right now?
NOTE: Flags will be easily identifiable by following the format CS{some_secret_flag_text}. They must be submitted in full, including the CS{ and } parts.
The challenge provides us with a proclamation.dat file
Initial analysis
To determine what the file proclamation.dat is, let’s run file on it. This gives us DOS/MBR boot sector. The MBR or Master Boot Record is a special sector of a partitioned drive. It is at the beginning of a drive (for example a USB drive) and contains an executable program called the bootloader, information on each partition on the drive and a magic number at the end. In our case, the bootloader is the most interesting part. Normally it is used at startup to call a secondary program that sets up the OS but sometimes, adversaries will corrupt this program to gain persistence. Code that’s saved in the MBR will basically be executed before the OS even starts so it operates outside of OS boundaries and can evade AV programs. Let’s see what happens if we run the drive using a virtualisation software. I used qemu for this challenge. The command that starts the VM is qemu-system-i386 proclamation.dat
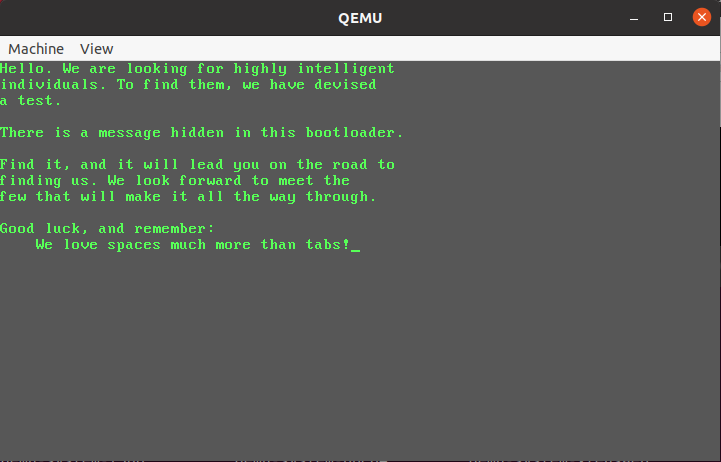
So the bootloader only displays this text. There’s no interaction with the program so there must be something hidden in the bootloader. If we run strings on the proclamation.dat file, the only thing we get is you’re on a good way. We can’t find any of the other strings that are displayed so they must be encrypted in some way.
Static Analysis
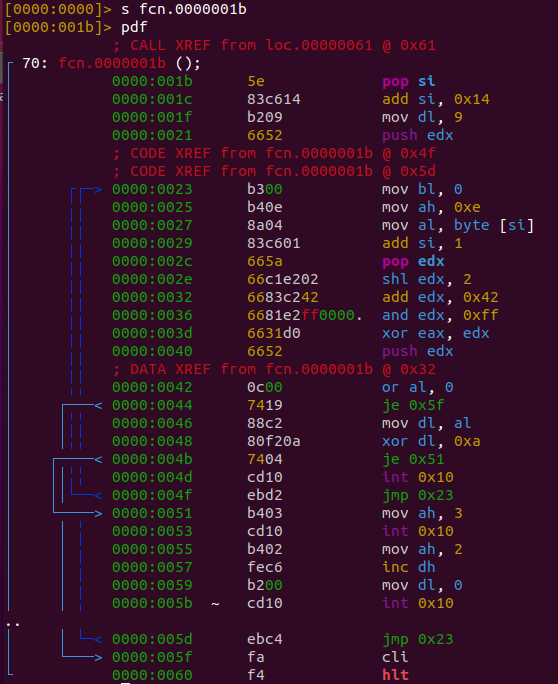
Now let’s take a look at the code. radare2 is a great tool to do this, simply run r2 -b proclamation.dat to see the dissassembly. The important part of the program starts at 0x1b.
I’ll write the important parts to notice now in different sections
first operand
mov dl, 9
push edx
Start of loop:
pop edx
shl edx, 2
add edx, 0x42
and edx, 0xff
push edx
This part of the code initializes a variable with 9, then on each iteration of a loop does some bit shifting and addition on it
second operand
mov al, byte[si]
add si, 1
This loops over some data array at si and puts the bytes into al
xor
xor eax, edx
or al, 0
je 0x5f
mov dl, al
xor dl, 0xa
je 0x51
int 0x10
jmp 0x23
The two operands are xored, then the result is first compared against 0xa (new line) then against 0x0. If it’s not one of either, the program traps to the BIOS that then teletypes (AH=0xe) the value inside al (the xored value). If it is 0x0, the program halts. Now that we know what the program does, we need to get the starting value of si to get the start point of the data array.
Dynamic Analysis
To debug a bootloader, we can use the remote gdb debugging feature of qemu. We start a session with qemu-system-i386 -s -S -m 512 -hda proclamation.dat
Then we start gdb and type in the following commands:
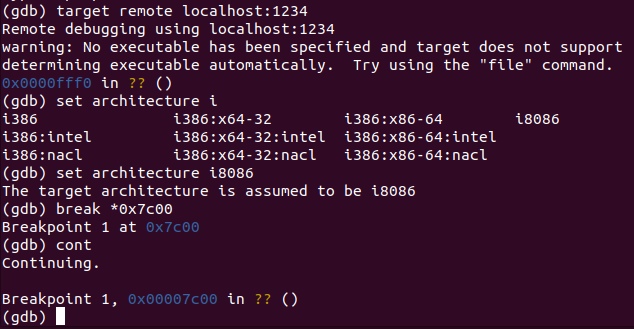
We break at 0x7c00 because that’s where the bootloader gets loaded into memory. If we want to get the value for si we should break at instruction 0x27 which, in virtual memory, is 0x7c27.
A quick look into the registers tells us that si is 0x7c78 at that point. We know have everything we need. There are two ways to solve this challenge now. If we set a breakpoint inside of the loop and we break repetitively on it, we see how the characters show up on the screen. We can do this until we get a value of 0x0. At this point the program jumps outside of the loop and stops. However, we can overwrite the instruction pointer and make it point to the start of the loop instead to let it continue decrypting the remaining bytes. If we do this, the following shows up:
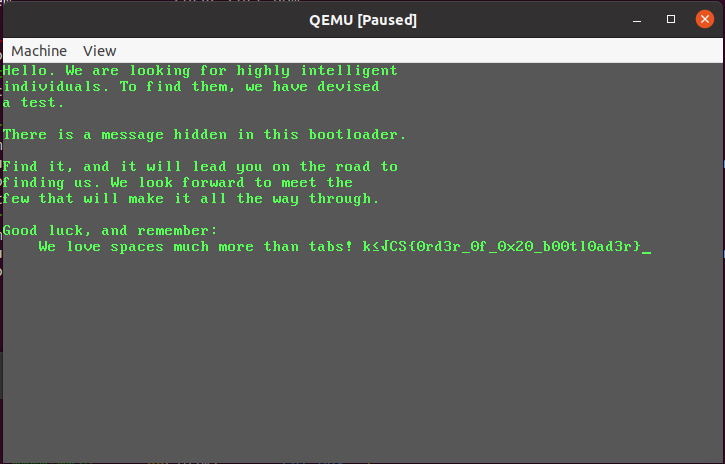
So the flag is CS{0rd3r_0f_0x20_b00tl0ad3r}.
Another way to get this flag is by writing a simple python script that takes care of the decryption:
encoded_data = "2ebfc68685c4cabd8fca8b988fca8685858183848dca8c8598ca82838d828693ca83849e8f8686838d8f849ee083848e839c838e9f8b8699c4cabe85ca8c83848eca9e828f87c6ca9d8fca828b9c8fca8e8f9c83998f8ee08bca9e8f999ec4e0e0be828f988fca8399ca8bca878f99998b8d8fca82838e8e8f84ca8384ca9e828399ca8885859e86858b8e8f98c4e0e0ac83848eca839ec6ca8b848eca839eca9d838686ca868f8b8eca93859fca8584ca9e828fca98858b8eca9e85e08c83848e83848dca9f99c4cabd8fca86858581ca8c85989d8b988eca9e85ca878f8f9eca9e828fe08c8f9dca9e828b9eca9d838686ca878b818fca839eca8b8686ca9e828fca9d8b93ca9e8298859f8d82c4e0e0ad85858eca869f8981c6ca8b848eca988f878f87888f98d0e0cacacacabd8fca86859c8fca999a8b898f99ca879f8982ca8785988fca9e828b84ca9e8b8899cbea811911a9b991da988ed998b5da8cb5da92d8dab588dada9e86da8b8ed9989797eaf4f4f4f4f4f4f4f4f4f4f4f4f4f4f4f4f4f4f455aa"

data = []
for i in range(len(encoded_data)//2):
    data.append(int(encoded_data[i*2:i*2 + 2],16))
variable = 9
for dat in data:
    variable = variable << 2
    variable += 0x42
    variable = variable & 0xff
    print(chr(dat^variable),end='')
The encoded data was extracted from proclamation.dat at the start offset 0x78, the value which, as we established earlier, was inside si at the first iteration of the loop. If we run this, we get the entire text that shows up.
Conclusion
This challenge was extremely interesting. It was the first time that I debugged a bootloader so I had to read up a lot on qemu and on how to use gdb as a remote debugger. In the process, I learned a lot about bootloader malware and I noticed the brilliance of radare2. Where ghidra failed, radare still produced a perfect dissassembly. The Crowdstrike CTF had a bunch of other really interesting challenges. Most of them were however quite hard and I didn’t really have a lot of time to put into them. I will look into some once I have more time and maybe I’ll publish some more writeups. Until next time
-Trigleos